Xamarin.Forms: Azure CosmosDBを使う
チュートリアルのとおりに.
Cosmos DB側の作業
Azure PortalでCosmosDBのリソース作成とサンプルデータの追加を行う.
リソースを作る

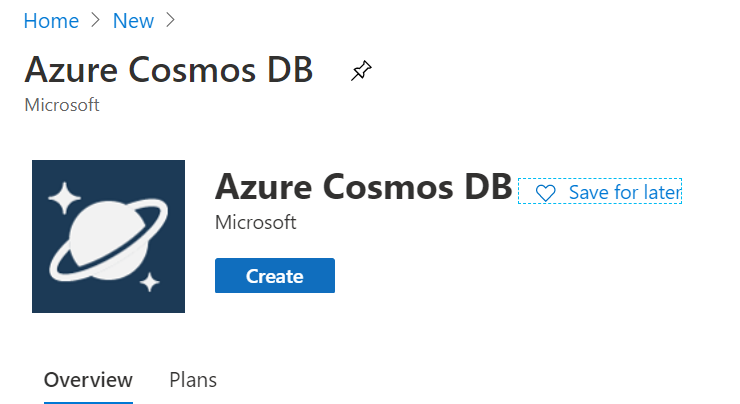
「Azure Cosmos DB」を検索して作成する.

以下のように入力する.
- Subscription
- 利用しているAzureのアカウント名
- Resource Group
- リソースグループには適当に名前を
- Account Name
- データベースサーバーの名前になるので重要
- この文字列がリソースのURIの一部に使われる.例:
<Account Name>.documents.azure.com - 一意でなければならないので,使用可能かどうかがチェックされる
- API
- Location
- 適当に
- Apply Free Tier Discount
- 最も重要
- 無料プランを使うかどうか
- もちろん使うので
Applyを選択
- ほかはデフォルトのままで.

一番下の「Review + Create」 ボタンを押す.
最後に「Create」ボタンを押す.これでリソースの作成が完了.

コンテナの作成
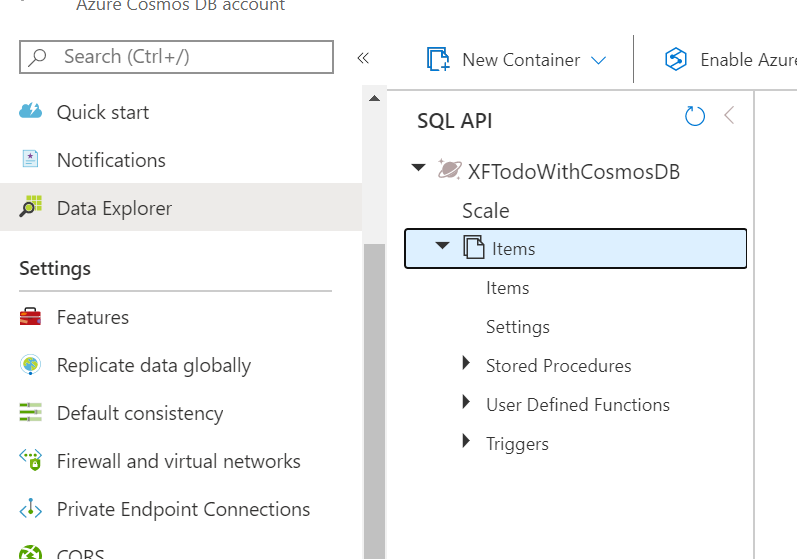
Cosmos DBのリソースへ移動し,左側のブレードから「Data Explorer」を選択し,「New Container」を押す.

- Database Id
- データベースの名前を入力する
- Throughput
- 「400」と入力
- Container Id
- Partition Key
- よくわからない
- チュートリアルどおり「/category」とする

あとはそのままにして「OK」ボタンを押す.
Data Explorerには以下のようにDBが作成され,「Items」というコンテナが作成されていることがわかる.

サンプルデータを追加する
Data Explorer -> Items -> New Itemsと選択する.

以下のJSONデータを貼り付け,「Save」ボタンを押す.
{
    "id": "1",
    "category": "personal",
    "name": "groceries",
    "description": "Pick up apples and strawberries.",
    "isComplete": false
}

以下のようにデータが格納される.

もう一つ追加してみる.今度は日本語を使う.
{
    "id": "2",
    "category": "学習",
    "name": "CosmosDBのチュートリアルをやる",
    "description": "以下のチュートリアルをやる.\n https://docs.microsoft.com/en-us/azure/cosmos-db/create-sql-api-xamarin-dotnet",
    "isComplete": false
}
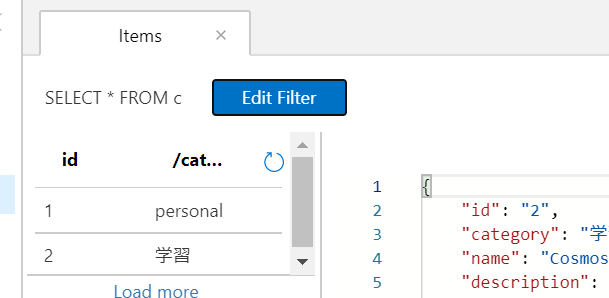
作成された.

データを検索する
「Edit Filter」ボタンを押す.

入力欄にSQLクエリを入力する.
例えば,id逆順で並べ替える場合は以下のようにする.

idが2のアイテムを検索したければ以下のようにする.

Xamarin.Formsアプリケーション側
ソースコードの取得
以下のリポジトリからgit cloneで取得する
git clone https://github.com/Azure-Samples/azure-cosmos-db-sql-xamarin-getting-started.git
URI(エンドポイント:接続先)とAPI Keyを取得する
Azure Portalで作成したCosmosDBのリソースを開き,左側のブレードからKeysを選択する.

表示されたURIとPrimary Keyをアプリケーション側で使用する.
アプリケーションにURIとAPI Keyを設定する.
先程git cloneしてきたソースコードをVisual Studioで開き,以下の場所にあるAPIKeys.csを開く.

    public class APIKeys
    {
        public APIKeys()
        {
        }

        public static readonly string CosmosEndpointUrl = "ここに<URI>を貼り付ける";

        public static readonly string CosmosAuthKey = "ここに<Primary Key>を貼り付ける";
    }
注意!
これはチュートリアルなので簡単にするためにコード内に直接URIやAPI Keyを貼り付けているが,このようなことは実際のアプリケーションではしてはいけない. とちゃんと書いてある.
どのようにするかはこちら
DB名,コンテナ名の指定
Azure Cosmos DBにデータを書き込んだり,読み込んだりするためにはDB名とその中のSQLでいうところのテーブル名にあたるコンテナ名をアプリケーション側で指定する必要がある.
公式のサンプルプログラムだとCosmosDBService.csファイル内にある次の2行がそれ.公式チュートリアルのとおりに作業を進めていれば以下のようになっている.
        static readonly string databaseName = "Tasks";
        static readonly string collectionName = "Items";
私は今回このDB名をXFTodoWithCosmosDBとしたので,変更した.
アプリからのCosmosDB利用の初期化部分
CosmosDBServiceクラス内の以下の部分.
このようにAzureにCosmosDBのリソースを作成してエンドポイントとAPI Keyが取得できれば,後のDB,コンテナの作成はMicrosoft.Azure.Cosmos.Coreを使って行うことができる.
それぞれ「存在しない場合に作成する」というメソッドなので,これらはワンセットで実行しておくといい気がする.
                docClient = new DocumentClient(new Uri(APIKeys.CosmosEndpointUrl), APIKeys.CosmosAuthKey);

                // Create the database - this can also be done through the portal
                //Azureポータルで作成しなくても,ここで作成できる.
                //初回作成時にリソースが無いということで例外が発生する.
                //でも,データベースはしばらくすると作成され,次からは例外が発生しない.
                await docClient.CreateDatabaseIfNotExistsAsync(new Database { Id = databaseName });

                // Create the collection - make sure to specify the RUs - has pricing implications
                // This can also be done through the portal
                //ここもコレクション(コンテナ)がない場合は作成を試みるが,
                //初回作成時はDBと同じく例外が発生する.
                //これもしばらくするとコレクションが作成され,その後は例外が発生しない.
                await docClient.CreateDocumentCollectionIfNotExistsAsync(
                    UriFactory.CreateDatabaseUri(databaseName),
                    new DocumentCollection { Id = collectionName },
                    new RequestOptions { OfferThroughput = 400 }
                );
取得,追加,削除,更新
取得
        public async static Task<List<ToDoItem>> GetToDoItems()
        {
            var todos = new List<ToDoItem>();

            if (!await Initialize())
                return todos;

            var todoQuery = docClient.CreateDocumentQuery<ToDoItem>(
                UriFactory.CreateDocumentCollectionUri(databaseName, collectionName),
                new FeedOptions { MaxItemCount = -1, EnableCrossPartitionQuery = true })
                .Where(todo => todo.Completed == false)
                .AsDocumentQuery();

            while (todoQuery.HasMoreResults)
            {
                var queryResults = await todoQuery.ExecuteNextAsync<ToDoItem>();

                todos.AddRange(queryResults);
            }

            return todos;
        }
追加
public async static Task InsertToDoItem(ToDoItem item)
{
    if (!await Initialize())
        return;

    await docClient.CreateDocumentAsync(
        UriFactory.CreateDocumentCollectionUri(databaseName, collectionName),
        item);
}
更新
        public async static Task UpdateToDoItem(ToDoItem item)
        {
            if (!await Initialize())
                return;

            var docUri = UriFactory.CreateDocumentUri(databaseName, collectionName, item.Id);
            await docClient.ReplaceDocumentAsync(docUri, item);
        }
削除
        public async static Task DeleteToDoItem(ToDoItem item)
        {
            if (!await Initialize())
                return;

            var docUri = UriFactory.CreateDocumentUri(databaseName, collectionName, item.Id);
            await docClient.DeleteDocumentAsync(docUri);
        }
実行
以下のようにToDoタブに上で追加した2つのアイテムが表示される.

追加やタスクの完了といった操作に応じて,CosmosDB側のデータが更新されることを確認する.
タスクを追加する.

アプリのToDoにアイテムが追加される.

Azureで確認すると,アイテムが追加されている.

メモ
CosmosDBを扱うライブラリはMicrosoft.Azure.Cosmos.CoreとMicrosoft.Azure.Cosmosのどちらを使うべきなんだろうか.