Xamarin.Formsでの通知の表示方法
これは各プラットフォームごとに実装して,それをインターフェース経由で共通プロジェクトから呼び出す.
公式ドキュメント+チュートリアル.
これをやった. ソースコードはこちら.
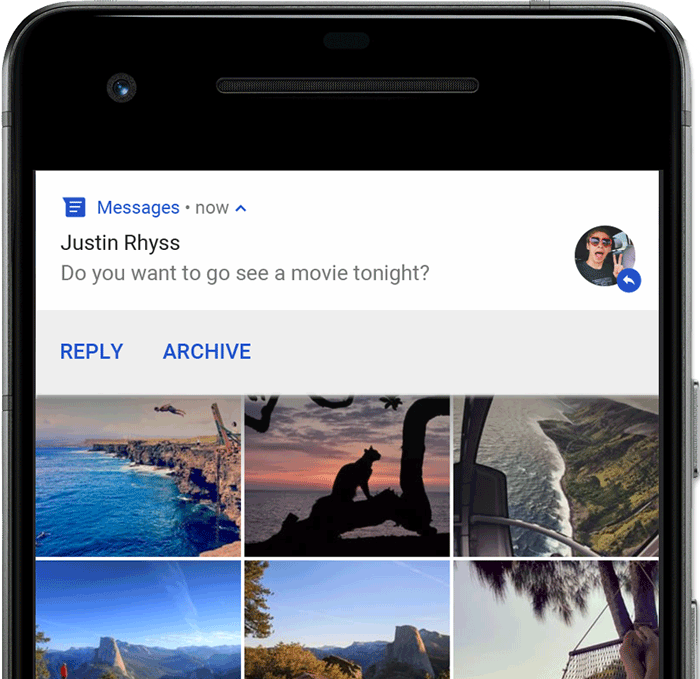
以下のように表示される.

沢山通知した場合は,以下のようにまとめられる(OSによって).

アイコンを設定したり,ネイティブのほうで実装しているので当然色々とできる.
通知機能はプラットフォーム固有機能なので,それぞれのプラットフォームで実装する.
ただし,それらの実装のためのインターフェースを定義しておくことで共有コードから呼び出すことができるので,使い方としてはインターフェースを作成,プラットフォームごとに実装.
Android 8.0以上ではNotificationChannelを作成してシステムに渡しておく必要がある.
なので,アプリが起動したら直ちに以下のようなコードが実行される必要がある.
チャネルの作成はChannelIDが同じなら複数作成されることはないので,何度呼び出されても構わない.通知のたびに実行されるようにしておいてもよい.
        private void CreateNotificationChannel()
        {
            _manager = (NotificationManager)AndroidApp.Context.GetSystemService(AndroidApp.NotificationService);
            if (Build.VERSION.SdkInt >= BuildVersionCodes.O)
            {
                var channelNameJava = new Java.Lang.String(_channelName);
                var channel = new NotificationChannel(_channelId, channelNameJava, NotificationImportance.Default)
                {
                    Description = _channelDescription
                };
                _manager.CreateNotificationChannel(channel);
            }

            _channelInitialized = true;
        }
DependencyServiceへの登録
各プラットフォームでの実装を共有プロジェクト側から利用するために,DependencyServiceというService Locator機能を使います. ここにクラスを登録しておくと,任意の場所でそのインスタンスを取り出すことができます.
各プラットフォーム側の実装をDependencyServiceに登録する方法の一つに以下のやり方があります.
[assembly: Xamarin.Forms.Dependency(typeof(XFNotification.Droid.AndroidNotificationManager))] //これ
namespace XFNotification.Droid
{
    public class AndroidNotificationManager : INotificationManager
    {
...
    }
}
このように対象のクラスの名前空間にDependencyAttributeを使って対象のクラスを指定すると,対象のクラスがコンパイル時にDependencyServiceに登録されます.
インスタンスの取得
通知機能を使いたい場所で以下のようにDependencyService.Get<INotificationManager>()メソッドを使ってインスタンスを取得します.
        public MainPage()
        {
            InitializeComponent();

            notificationManager = DependencyService.Get<INotificationManager>();
            notificationManager.NotificationReceived += (sender, eventArgs) =>
            {
                var eventData = (NotificationEventArg)eventArgs;
                ShowNotification(eventData.Title, eventData.Message);
            };
        }
実装についてメモ
[assembly: Xamarin.Forms.Dependency(typeof(XFNotification.iOS.iOSNotificationManager))]
このDependencyはXamarin.Forms.Dependencyであって,System.Runtime.CompilerServices.Dependencyではないので注意.
参考
Amayさんのブログ
Javaを使ったAndroid開発での通知の表示方法だけれど,参考になる.
しかしながら,これらはNugetで各種パッケージが用意されているようだ.
それはそうだよな.
Xam.Plugins.Notifier
これはとてもシンプルな通知機能. Nugetからインストールして,使いたいところで以下の1行を記述するだけ.
//タイトルと本文のみを指定
CrossLocalNotifications.Current.Show($"TestTitle", "This is Test");

//指定した時刻になったら通知を表示することもできる.
CrossLocalNotifications.Current.Show($"TestTitle", "This is Test",counter,DateTime.Now.AddSeconds(5));
このように表示される.

こちらは沢山通知を送っても,表示されるのは最新の1件のみのようだ.

アイコンは指定できない?
Plugin.LocalNotification
参考
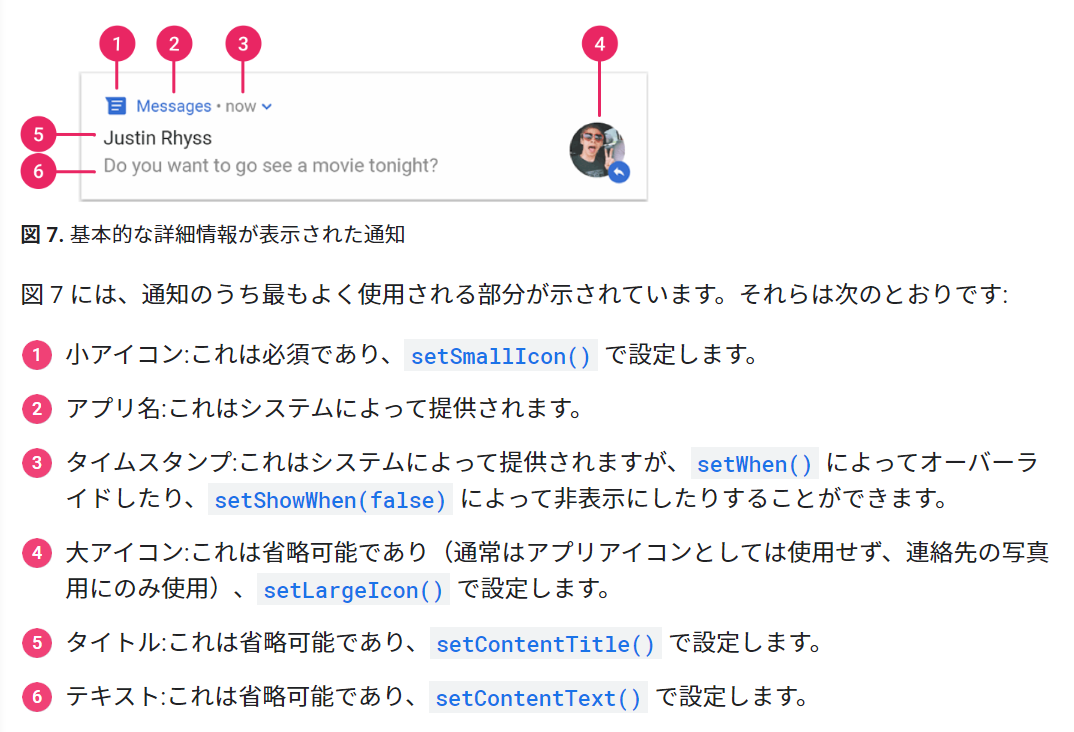
Android側での詳しいオプションや表示については以下の公式ページが詳しい

ヘッドアップ通知
デフォルトでは通知はステータスバーにアイコンが表示され,通知を見る際にステータスバーを下にスワイプすることで通知内容を確認する.

ヘッドアップ通知というのはディスプレイにフローティングのウィンドウを一定時間表示させるタイプの通知方法で,重要な内容を通知するときに使われる.

NotificationChannel作成時に重要度(Importance)を指定するが,ここでNotificationImportance.Highを指定するとヘッドアップ通知される.
SetPriority(NotificationCompat.PriorityHigh)
この重要度の設定による動作の違いについては以下を参照.

Android 7.1以下ではChannelは使わない.このため,上記の重要度の設定は通知本体(NotificationCompat.Builder)の方で指定することになる.
            NotificationCompat.Builder builder = new NotificationCompat.Builder(AndroidApp.Context, _channelId)
                .SetContentIntent(pendingIntent)
                .SetContentTitle(title)
                .SetContentText(message)
                .SetLargeIcon(BitmapFactory.DecodeResource(AndroidApp.Context.Resources, Resource.Drawable.icon))
                .SetSmallIcon(Resource.Drawable.icon)
                .SetAutoCancel(true)
                .SetPriority(NotificationCompat.PriorityHigh)//これ
                .SetDefaults((int)NotificationDefaults.Sound | (int)NotificationDefaults.Vibrate);
int型の数値で指定するか,NotificationCompatクラスに用意されているフィールドを使う.(-2~2の値)
以下のように表示される.

SetOngoing
SetOngoing(true)としておくと,スワイプで消せない通知になる.
例えばバックグラウンドで動き続けるサービス,音楽,動画再生,位置情報取得などを使う場合は,動作中はこのOnGoingをTrueにして,ユーザーがわかるようにする.
終わったらSetOngoing(false)してやる.
Androidの通知について詳しい動画
Xamarinではないけれど,書き方はほとんど同じな.